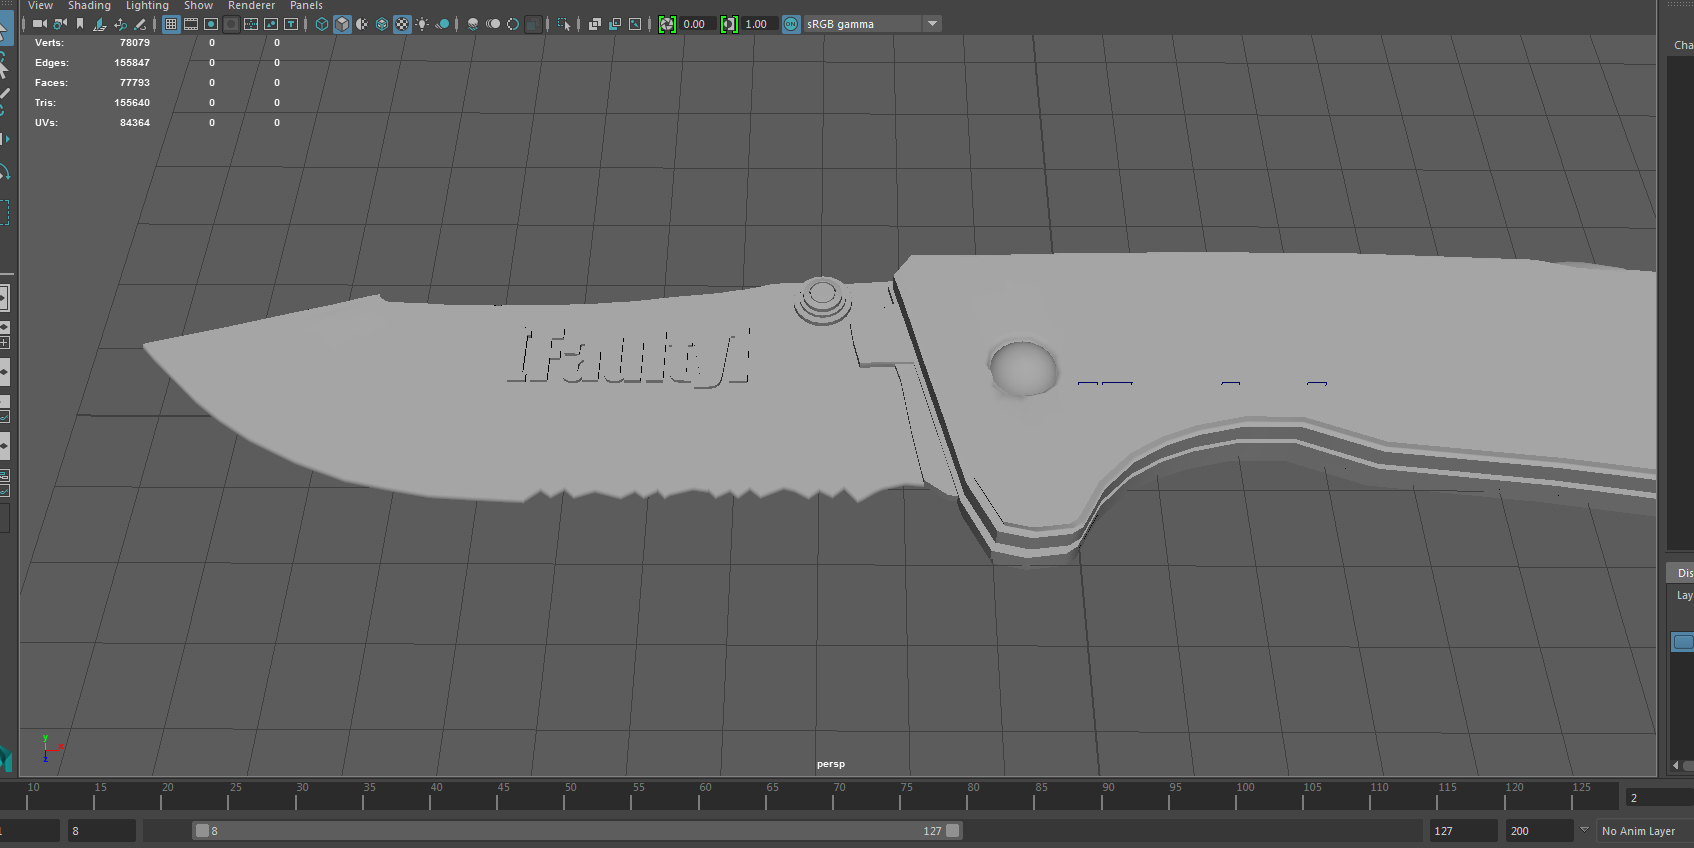
As I explained in my previous post, I’ve decided to squash two weeks worth of updates into one post about each topic. This one is focused on the 3D modelling program Maya, where we have been modelling a high-poly combat knife as a tutorial for how to build our own highly detailed models for marking.
I’ve found following the instructions for building the knife very difficult so far, partially due to my clumsiness with the software, and partly because following another person’s workflow can be tricky when there are a few different routes to reaching similar things within the process.
I am continuing to try completing the knife, however the focus has shifted slightly now onto building my own model, as this is what is actually marked at the end. I mentioned in a previous post that I had created my own concept for this project, which was a small personal spacecraft. However, even at the time I voiced concerns over its viability for the project. In short, even with all the time in the world I’m not sure if I’d be able to model it, let alone in the limited time frame we have for this.

To address this problem, I preemptively began designing just a section of the ship, the engine, in order to make it more suitable for modelling. You can see the unfinished attempt below.

I quickly realised a short way into the drawing that the design was far too unrealistic and uninteresting to work. The point is to model a detailed and realistic object, and what I’ve drawn here is completely made up and non-functional. It also lacks many interesting details and has fairly bland surfaces. As a result of this, I quickly switched to modelling from a reference (which was the suggested way of working in the first place) and chose a real world object to work from.
For choosing an object to make, I stayed in the same ballpark and decided to do the spinning blades of a jet engine. I gathered a few images from different angles to begin with.


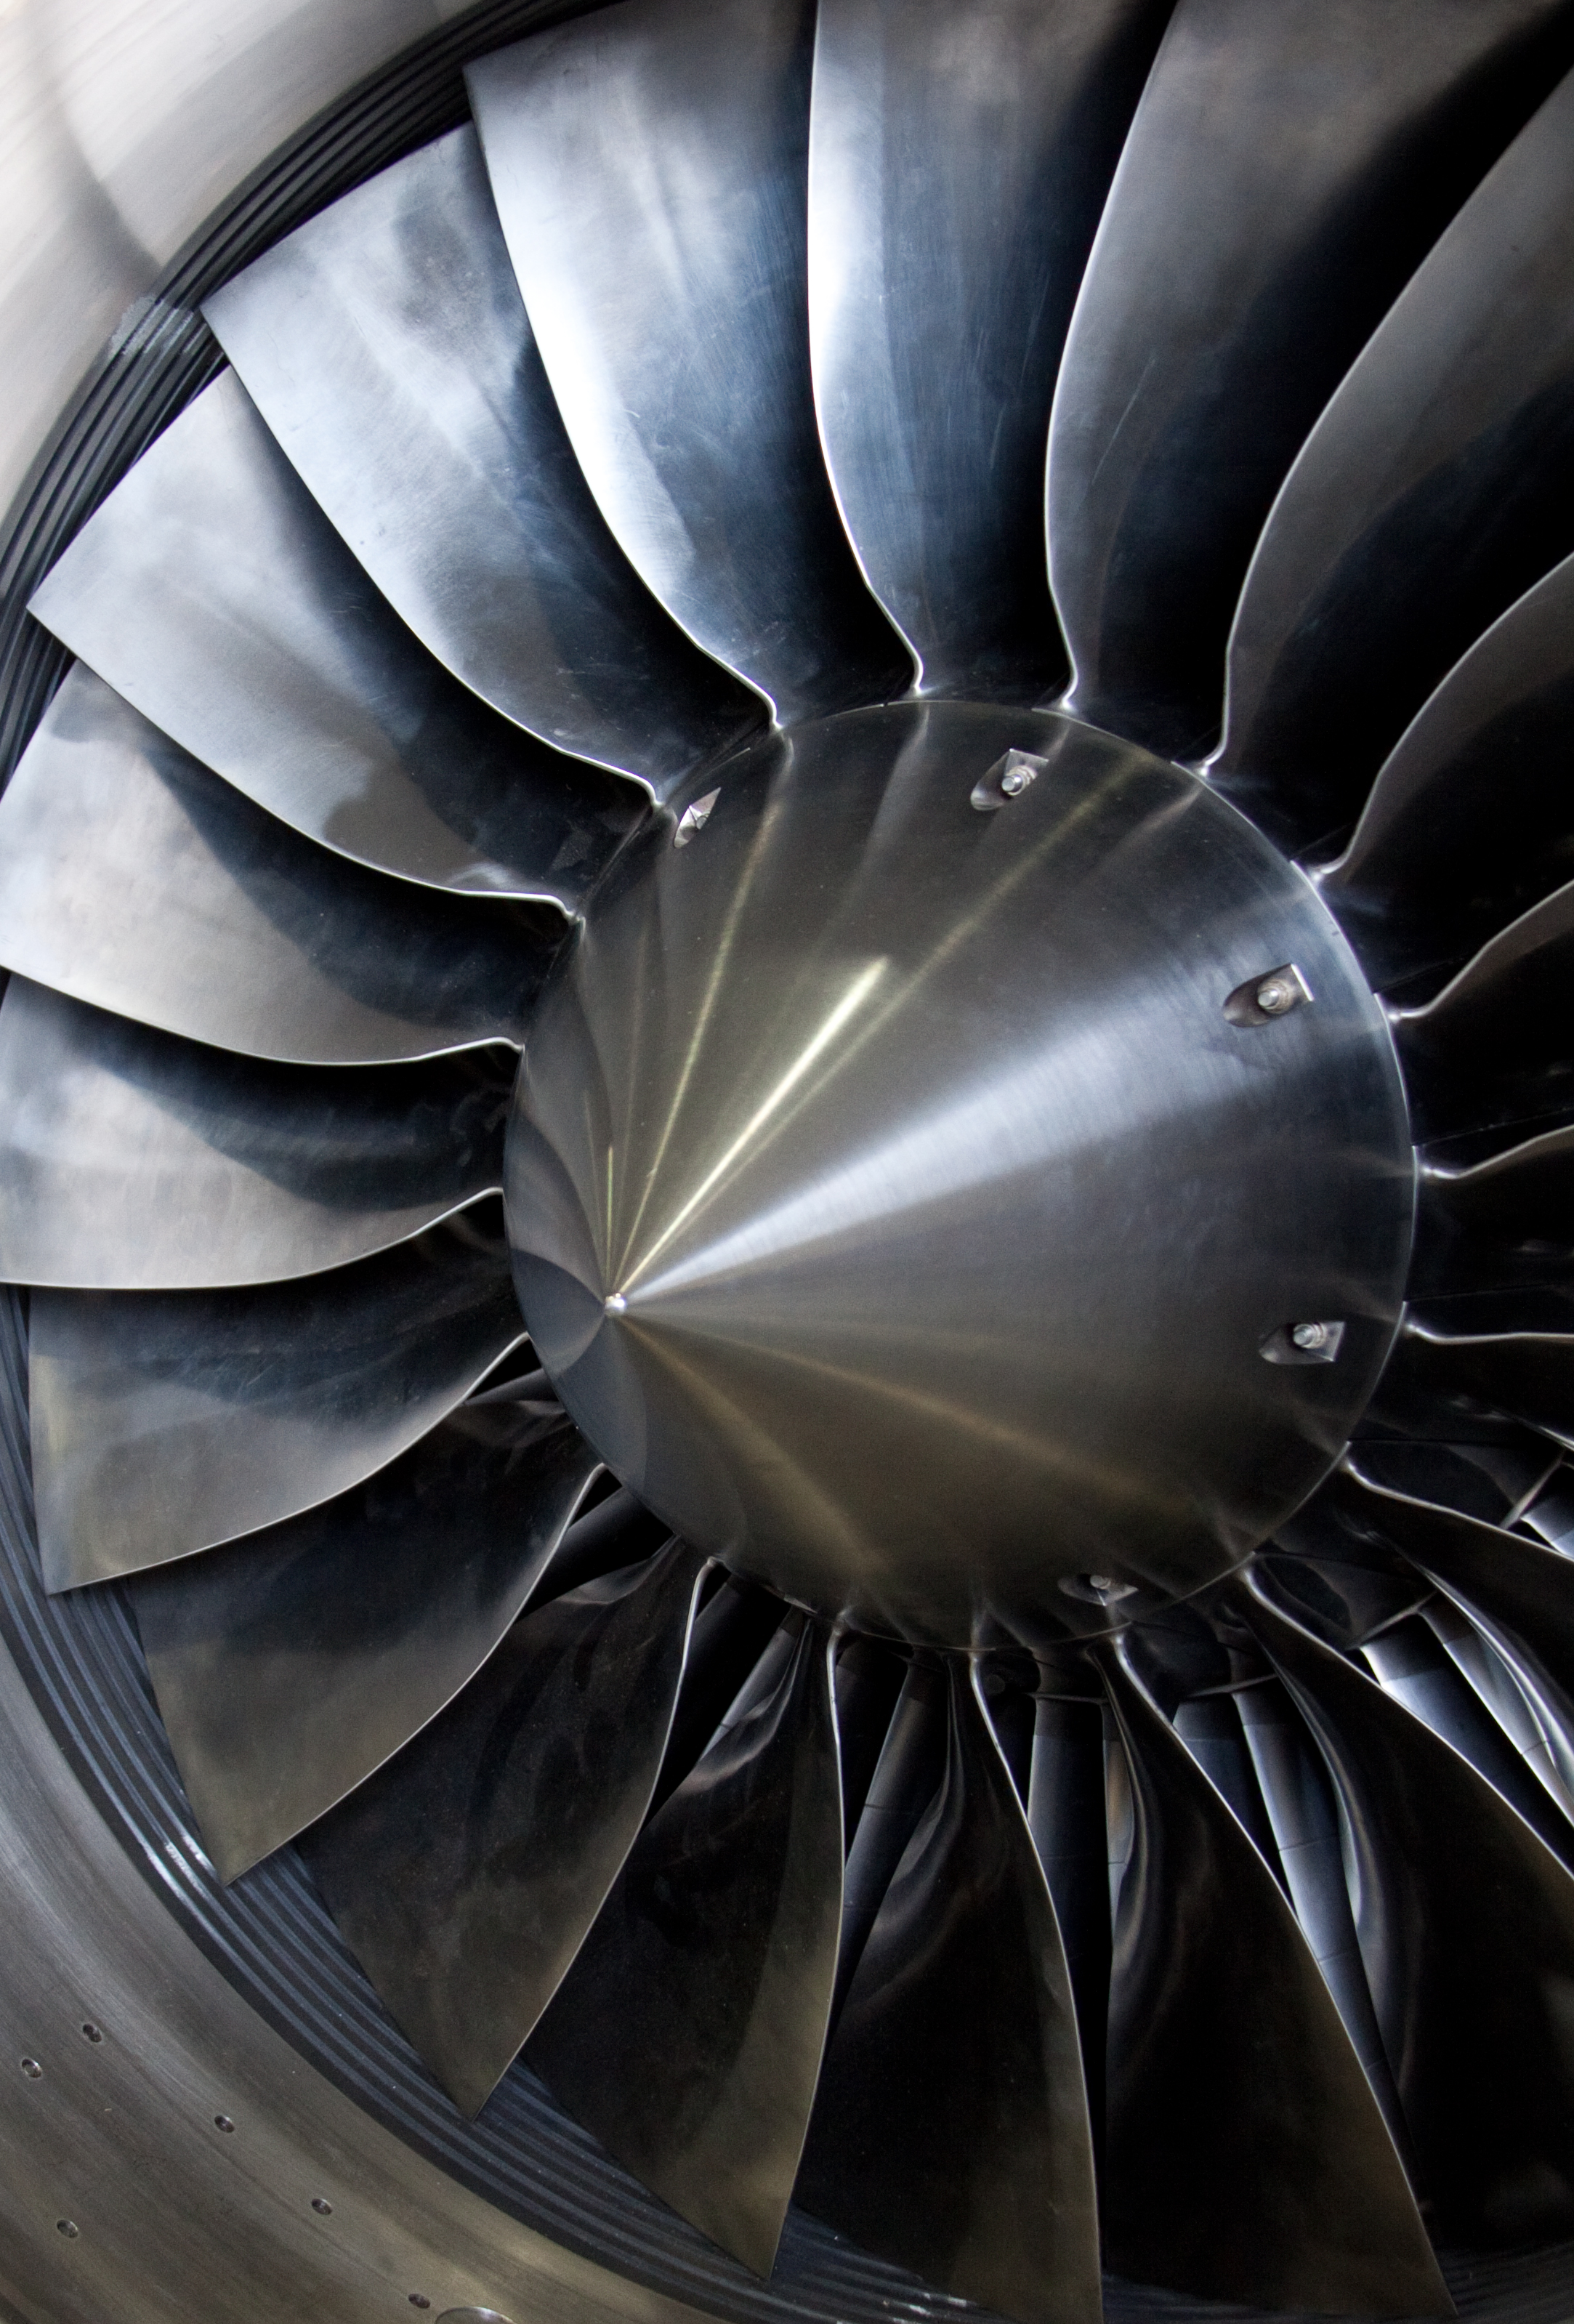
Once I had some references, I began modelling in as much detail as possible, and pressing the 3 key regularly to check the model in a sub-divided smoothing mode for higher levels of geometry. I haven’t gotten hugely far yet, but so far I’ve nearly completed the front cone of the engine. I plan to only model the blades and external shell, giving me more time to focus on making the parts I have done look better.


I’m fairly happy with the direction the model is going in so far. I’m not particularly good with 3D, so even fairly simple shapes like this one are a bit of a challenge, but I feel like I’m getting there with this one and will be able to present something that looks decent at the end of this. One thing I’m really trying to keep an eye on is my topology and keeping my mesh from becoming a hacky disaster, which is often the result when I use Maya. Hopefully if I carry on with caution I’ll be able to keep things going well at a slow pace until I come to use ZBrush on it, where I should be able to relax a bit more with the process.
